Is your home feeling less cozy than it should be, even with the heating on full blast? The culprit might be hidden in plain sight: dust accumulation on your radiator fins. Over time, these vital components can become clogged with dirt, pet hair, and debris, significantly reducing their efficiency and potentially leading to higher energy bills. Understanding how to safely and effectively clean radiator fins is crucial for maintaining a warm, energy-efficient home and ensuring your heating system operates at its best. This comprehensive guide will walk you through everything you need to know, from essential tools to step-by-step instructions, ensuring a thorough and damage-free cleaning process.
Why Cleaning Radiator Fins Matters for Your Home
Radiator fins are the unsung heroes of your heating system, designed to maximize the surface area for heat exchange and efficiently warm your living spaces. When these delicate fins become caked with dust and grime, their ability to transfer heat diminishes significantly. This blockage acts as an insulator, forcing your radiator to work harder and longer to achieve the desired temperature, directly translating into increased energy consumption and higher utility bills.
Beyond efficiency, a dusty radiator can also impact your indoor air quality. As the radiator heats up, it circulates air, along with any trapped dust particles and allergens. Regular cleaning not only restores optimal heating performance but also contributes to a healthier environment by reducing airborne irritants. For homes with pets or individuals sensitive to dust, this aspect of maintenance is even more critical. Prioritizing radiator fin cleanliness is an investment in both your comfort and your wallet.
Essential Tools for Safe Radiator Fin Cleaning
Before you begin the cleaning process, gathering the right tools will make the task much easier, safer, and more effective. You likely have most of these items around your home already.
- Vacuum Cleaner with Brush/Crevice Attachment: This is your primary tool for tackling loose dust. A brush attachment is gentle on the fins, while a crevice tool can reach tighter spots.
- Soft-Bristled Brush: A long-handled radiator brush is ideal for reaching deep into the fins and behind the radiator. Alternatively, an old paintbrush or even a soft-bristled toilet brush (dedicated for this purpose) can work.
- Microfiber Cloths/Rags: Essential for wiping down surfaces and for damp cleaning.
- Mild Soap and Water: For deeper cleaning of stubborn grime. Use a very small amount of dish soap diluted in water.
- Old Toothbrush or Pipe Cleaners: Perfect for meticulously cleaning between individual fins where larger brushes cannot reach.
- Compressed Air (Optional): Cans of compressed air can be effective for blowing out dust from very tight spaces, but always use with caution and a vacuum nearby to capture dislodged dust.
- Fin Comb (Optional): If your radiator fins are bent, a specialized fin comb can help gently straighten them, restoring proper airflow.
“Many people overlook radiator maintenance, but a clean set of fins can significantly improve your heating system’s performance and longevity. It’s a simple task that yields considerable benefits.” – John Peterson, HVAC Technician
Step-by-Step Guide to Safely Cleaning Radiator Fins
Cleaning your radiator fins is a straightforward process that requires patience and care. Follow these steps for a thorough and safe clean:
Preparation: Safety First
|
Our Picks for the Best Oil filled radiator in 2026
As an Amazon Associate I earn from qualifying purchases.
|
||
| Num | Product | Action |
|---|---|---|
| 1 | PELONIS Radiator Heater for Large Space, Electric Oil Filled Radiator, Dual Knobs, 1500W, Quiet Space Heater, 3 Modes, Tip-over Protection |

|
| 2 | Amazon Basics Portable Oil Space Heater with Remote Control, 7 Oil-Filled Fins, Adjustable Thermostat, 3 Heat Settings, Tip-Over and Overheat Protection, ETL Safety Certificate, 1500W, Black |
|
| 3 | Amazon Basics Portable Oil Space Heater with 7 Oil-Filled Fins, 3 Heat Settings, Adjustable Thermostat, Tip-Over and Overheat Protection, ETL Safety Certificate, 1500W, Black |
|
| 4 | Pelonis Oil Filled Radiator Heater for Large Space, 2025 Upgraded, Space Heaters with 1500W Quiet Warmth Radiant Heater, 3 Heating Modes, Overheat & Tip-Over Protection, Adjustable Thermostat, White |
|
| 5 | Amazon Basics Portable Oil Radiator Heater, Indoor Use, 3 Heat Settings, Over-Heat Protection, ETL-certified Safety, 7 Oil-Filled Steel Fins, 1500W, Tip-Over Protection, 11"D x 14.8"W x 25.2"H, White |
|
| 6 | PELONIS Radiator Heater for indoor use Large Room with Remote, Thermostat & LED Display, Quiet Oil Filled Heater with 5 Temperature Settings, Overheat & Tip-Over Protection, Silver |
|
| 7 | Pelonis Oil Filled Radiator Heater for Large Space, 2025 Upgraded, Space Heaters with 1500W Quiet Warmth Radiant Heater, 3 Heating Modes, Overheat & Tip-Over Protection, Adjustable Thermostat, Black |
|
| 8 | DREO Oil Filled Radiator, Electric Radiant Heaters for indoor use Large Room with Remote Control, Child Lock, 4 Modes, Overheat & Tip-Over Protection, 24h Timer, Digital Thermostat, Quiet, 1500W |
|
| 9 | PELONIS Oil Filled Radiator, Electric Space Heater for Indoor Use Large Room with Thermostat & Remote, 3 Modes & 3 Heat Settings, ECO Mode, 24H Timer, Quiet, Overheat & Tip-Over Protection, 1500W |
|
| 10 | PELONIS Radiator Heater for Large Space, Electric Oil Filled Radiator, Dual Knobs, 1500W, Quiet Space Heater, 3 Modes, Tip-over Protection |
|
- Turn Off and Cool Down: Absolutely essential. Ensure your radiator is completely turned off at the thermostat and allowed to cool down to the touch before you begin. Working on a hot radiator poses a burn risk.
- Clear the Area: Remove any furniture, curtains, or decorative items that might be obstructing access to the radiator. This provides you with ample space to work efficiently.
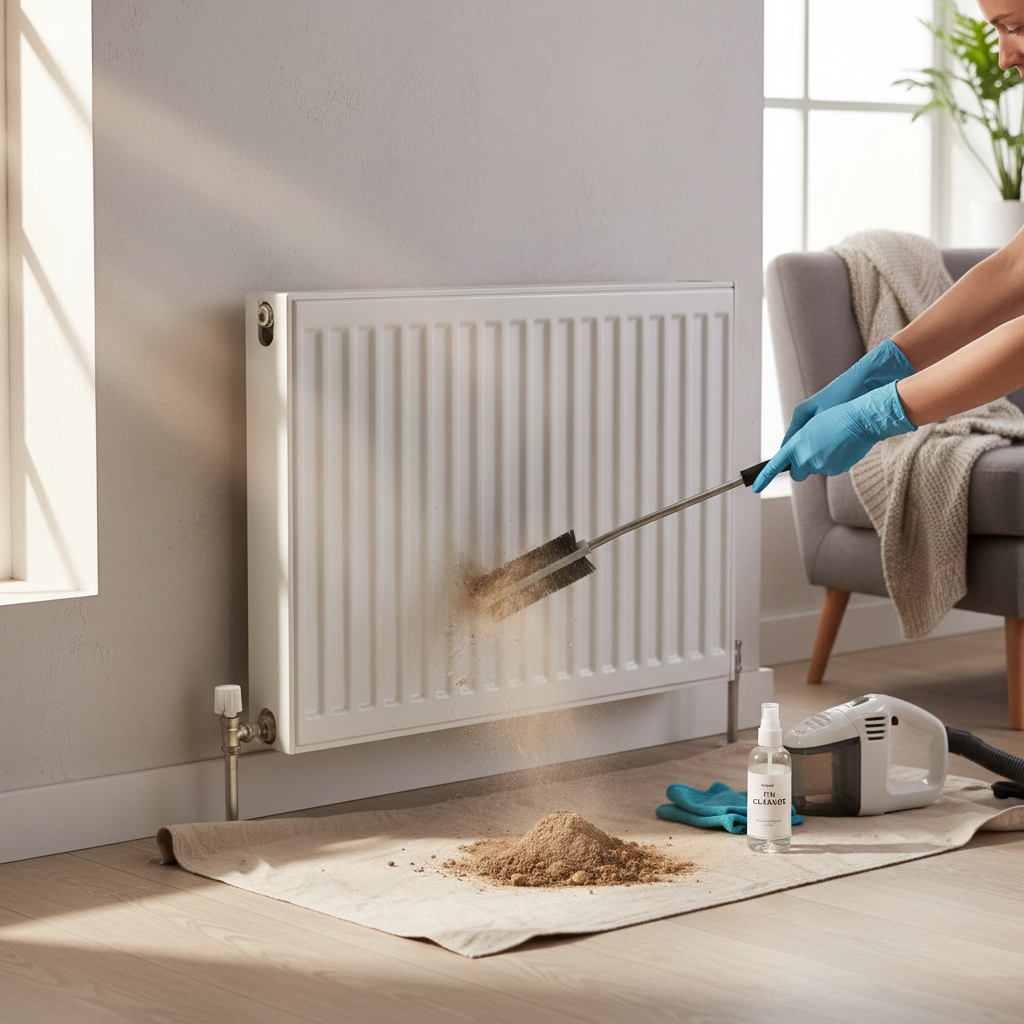
- Lay Down a Sheet/Towel: Place an old sheet or towel on the floor directly beneath the radiator to catch any dust and debris that will fall during cleaning. This makes cleanup much easier.
Initial Dust Removal: The Dry Clean
- Vacuum the Surface: Use your vacuum cleaner with the brush attachment to gently vacuum the exterior surfaces of the radiator. This removes the first layer of loose dust and cobwebs.
- Vacuum Between Fins: Attach the crevice tool or a soft brush attachment to your vacuum. Carefully run it along the gaps between the radiator fins, working from top to bottom. Apply gentle suction to lift out loose dust. Move slowly to avoid damaging the delicate fins.
- Brush Deeper with a Radiator Brush: For dust lodged deeper within the fins, use a long-handled radiator brush. Insert the brush between the fins from the top and gently push it downwards, dislodging accumulated dust and debris. Repeat this several times across the entire length of the radiator, allowing the dust to fall onto the sheet below.
Deep Cleaning for Stubborn Grime
- Damp Wipe the Exterior: Lightly dampen a microfiber cloth with plain water (or a very mild soap solution). Wring it out thoroughly so it’s just damp, not wet. Gently wipe down the outer surfaces of the radiator.
- Clean Individual Fins with a Toothbrush/Pipe Cleaner: For any remaining stubborn dirt or grime lodged deep between the fins, an old toothbrush or pipe cleaner is invaluable. Carefully work the bristles or pipe cleaner into the gaps to scrub away any stuck-on debris.
- Use Compressed Air (If Needed): If dust remains in extremely tight spots, you can use a can of compressed air. Position your vacuum cleaner directly below the area you are blowing to immediately capture the dislodged dust and prevent it from becoming airborne. Always wear eye protection if using compressed air.
Dealing with Difficult Areas and Bent Fins
- Behind the Radiator: If you can access behind the radiator, repeat the vacuuming and brushing steps. Some radiators can be gently pulled away from the wall slightly, but consult your manufacturer’s guide if unsure.
- Straightening Bent Fins: If you notice any bent fins, which can impede airflow, use a fin comb (if you have one) or a thin, flat tool like a butter knife. Gently and carefully work the tool to straighten the fins without applying excessive force that could break them.
Final Touches
- Vacuum Residual Dust: Once you’ve cleaned the fins, use your vacuum again to clean up all the dust and debris that has fallen onto the sheet on the floor.
- Reassemble and Reset: If you removed any covers or panels, reattach them securely.
- Turn On the Radiator: You can now safely turn your radiator back on and enjoy the improved heating efficiency.
Maintenance Tips for Long-lasting Radiator Efficiency
Regular maintenance extends the life of your radiator and ensures consistent performance.
Cleaning Frequency
- Aim to clean your radiator fins at least once a year, ideally before the start of the heating season.
- If you have pets that shed heavily, or if anyone in your household suffers from allergies, consider cleaning them more frequently, perhaps every few months.
- A quick vacuuming of the exterior surfaces every few weeks can also prevent significant buildup.
Avoiding Obstructions
- Ensure that furniture, curtains, or other objects are not placed directly in front of or on top of your radiators. Blocked radiators cannot efficiently radiate heat into the room.
- Keep the area around the radiator clear to allow for optimal airflow, which is essential for convection heating.
Professional Checks
While cleaning your radiator fins yourself is effective, consider having your entire heating system professionally serviced every few years. A technician can inspect for internal issues, balance the system, and address any concerns beyond routine cleaning.
Common Issues and How to Resolve Them
Even with regular cleaning, you might encounter minor issues. Here’s a quick guide to troubleshooting common problems:
- Radiator Still Not Heating Efficiently: After cleaning, if you notice the radiator is still not heating a room effectively, it might be due to air trapped in the system (requiring bleeding) or a faulty valve. These issues typically require professional attention.
- Bending Fins During Cleaning: If you accidentally bend a fin, use a fin comb or a thin, flat tool to gently straighten it. Work slowly and carefully to avoid further damage. Significant damage might impact efficiency and could warrant a professional assessment.
- Excessive Dust Buildup: If your radiator collects dust very quickly, consider investing in an air purifier for your home, especially if you have pets. Regularly vacuuming your floors and dusting surfaces can also reduce the amount of dust circulating in the air that settles on your radiator.
Conclusion
Cleaning your radiator fins is a simple yet impactful home maintenance task that can significantly improve your heating system’s efficiency, reduce energy costs, and contribute to a healthier indoor environment. By following the safe and systematic steps outlined, you can easily remove dust and grime, ensuring your radiator operates at its peak performance. Regular attention to these unsung heroes of your home will keep you warm and comfortable throughout the colder months. Don’t let dust diminish your comfort—take control of your heating efficiency today!
Have you noticed a significant difference in your home’s warmth after cleaning your radiator fins?
Câu Hỏi Thường Gặp
How often should I clean my radiator fins?
It is recommended to clean your radiator fins at least once a year, typically before the heating season begins. However, if you have pets, high dust levels, or allergies, more frequent cleaning every few months can be beneficial to maintain optimal efficiency and air quality.
Can I use water to clean inside the radiator fins?
It’s generally best to avoid excessive water directly on the internal fins, especially for electrical radiators, as it can cause rust or damage. For deeper cleaning of stubborn grime, a damp microfiber cloth with a very mild soap solution is suitable for wiping, ensuring it’s thoroughly wrung out to prevent dripping water. Always dry the area completely afterward.
What happens if I don’t clean my radiator fins?
Neglecting to clean radiator fins leads to dust accumulation that acts as an insulator, hindering heat transfer. This forces your heating system to work harder, consuming more energy and increasing utility bills. It can also reduce indoor air quality by circulating dust and allergens.
Is compressed air safe for cleaning radiator fins?
Compressed air can be used for tight spots, but it should be used cautiously. Always wear eye protection and use a vacuum cleaner simultaneously to capture the dislodged dust rather than letting it become airborne and settle elsewhere in your home. Avoid very high pressure that could potentially damage delicate fins.
How do I straighten bent radiator fins?
If radiator fins are bent, which can impede airflow, you can gently straighten them using a specialized fin comb. Alternatively, a thin, flat tool like a butter knife or a flat-head screwdriver can be carefully used. Work slowly and apply minimal pressure to avoid further damage to the delicate metal.
Are there any dangers in cleaning radiator fins?
The main dangers include burns from a hot radiator if not turned off and cooled, electrical shock if water gets into an electrical system (for electric radiators), or damaging delicate fins by using excessive force or inappropriate tools. Always ensure the radiator is off and cool, and be gentle with the fins.
