Few things are as comforting as a warm room on a chilly day, and an oil-filled radiator often serves as a reliable heat source. However, discovering an oily puddle beneath your cherished appliance can quickly turn that comfort into concern. A leaking oil-filled radiator isn’t just an unsightly mess; it can be a safety hazard and significantly reduce your heater’s efficiency. While the thought of a DIY repair might seem daunting, many common leaks can be addressed with a few basic tools and a careful, methodical approach. This guide will walk you through the process, empowering you to identify, assess, and potentially fix a leaking oil-filled radiator yourself, ensuring your home remains warm and safe.
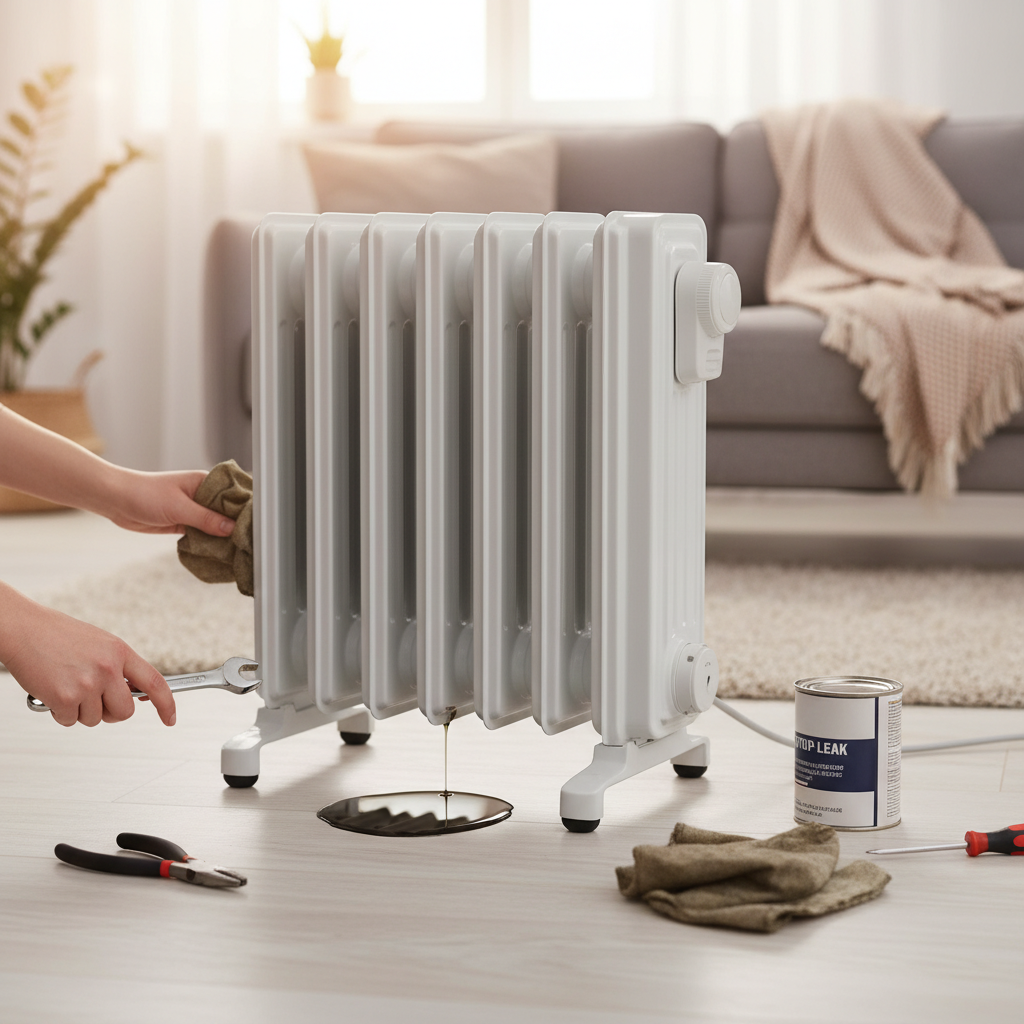
Understanding Your Oil Filled Radiator and Why It Leaks
An oil-filled radiator operates on a simple, yet effective principle: an electrical element heats diathermic oil sealed inside the radiator’s fins. This oil transfers heat to the metal surfaces, which then radiate warmth into the room, creating a gentle and consistent heat. The oil itself does not burn off; it acts merely as a heat reservoir and transfer medium.
Despite their robust design, oil-filled radiators can develop leaks over time. These leaks typically stem from a few common points:
- Filler Caps/Plugs: The point where the oil was originally filled and sealed during manufacturing can degrade or loosen.
- Seams and Welds: Over years of heating and cooling cycles, the metal casing can experience stress, leading to hairline cracks or weaknesses in the welded seams.
- Heating Element Flange/Gasket: The electrical heating element is often sealed into the radiator body with a gasket. This gasket can deteriorate, or the bolts holding the flange in place can loosen.
- Drain Plugs: While less common, some older models might have a drain plug that could develop a leak.
The dangers of a leaking radiator extend beyond a messy floor. The escaping oil can pose a slip hazard, attract dust, and potentially damage flooring. More critically, if oil comes into contact with the hot electrical elements, it could present a fire risk. A significant loss of oil will also impair the radiator’s ability to heat effectively, leading to increased energy consumption without adequate warmth.
Is Your Leaking Oil Filled Radiator Repairable? Initial Assessment
Before grabbing your toolkit, it’s crucial to properly assess the leak to determine if a DIY repair is feasible or if professional help or replacement is needed. Start by thoroughly cleaning the exterior of your radiator to remove any old oil residue and dust. This will make it easier to pinpoint the exact source of the leak.
Once clean, let the radiator sit for a while, unplugged and cooled, and observe closely. Look for fresh drips, streaks, or wet spots on the fins, under the control panel, or near any plugs or seams.
- Small, localized drips often indicate a loose fitting, a compromised gasket, or a failing thread seal. These are generally good candidates for DIY repair.
- A constant trickle or a large pool of oil might suggest a more significant issue, such as a major crack in a weld or extensive damage, which is typically beyond the scope of a home repair.
- Leaks from the main body or welded seams are usually not repairable by DIY methods. Attempting to patch these can be ineffective and potentially dangerous.
Consider the age of your radiator. An older unit with multiple leaks or significant rust might be more economical to replace than to repair. However, a relatively new radiator with a single, identifiable leak is often worth attempting to fix. When in doubt about the severity or location of a leak, prioritize safety and consult a qualified appliance technician.
Essential Tools and Materials for DIY Repair
To effectively tackle a leaking oil-filled radiator, gather the following tools and materials before you begin:
- Screwdrivers: Both Phillips and flathead, for opening access panels.
- Adjustable Wrench or Spanner Set: Essential for tightening or removing nuts and bolts.
- PTFE Thread Seal Tape (Teflon Tape): Opt for a heavy-duty, oil-compatible version. This is crucial for sealing threaded connections.
- Rags/Towels: For cleaning and soaking up any spilled oil.
- Protective Gloves: To keep your hands clean and protected from oil.
- Drip Tray or Old Newspaper: To place under the radiator and catch any oil that might leak during the repair.
- Safety Glasses: To protect your eyes from splashes.
- Flashlight: To better illuminate dark areas and spot the leak source.
- (Optional) Gasket Sealant: An oil-resistant sealant designed for high temperatures, if you suspect a gasket failure.
Having these items on hand will ensure a smoother and safer repair process.
Step-by-Step Guide to Fixing a Leaking Oil Filled Radiator
Addressing a leak in your oil-filled radiator requires patience and adherence to safety protocols. Follow these steps carefully to maximize your chances of a successful DIY repair.
Safety First: Disconnect Power and Prepare Your Workspace
|
Our Picks for the Best Oil filled radiator in 2026
As an Amazon Associate I earn from qualifying purchases.
|
||
| Num | Product | Action |
|---|---|---|
| 1 | PELONIS Oil Filled Radiator, Electric Space Heater for Indoor Use Large Room with Thermostat & Remote, 3 Modes & 3 Heat Settings, ECO Mode, 24H Timer, Quiet, Overheat & Tip-Over Protection, 1500W |

|
| 2 | Amazon Basics Portable Oil Space Heater with Remote Control, 7 Oil-Filled Fins, Adjustable Thermostat, 3 Heat Settings, Tip-Over and Overheat Protection, ETL Safety Certificate, 1500W, Black |
|
| 3 | Pelonis Oil Filled Radiator Heater for Large Space, 2025 Upgraded, Space Heaters with 1500W Quiet Warmth Radiant Heater, 3 Heating Modes, Overheat & Tip-Over Protection, Adjustable Thermostat, White |
|
| 4 | PELONIS Radiator Heater for indoor use Large Room with Remote, Thermostat & LED Display, Quiet Oil Filled Heater with 5 Temperature Settings, Overheat & Tip-Over Protection, Silver |
|
| 5 | Amazon Basics Portable Oil Space Heater with 7 Oil-Filled Fins, 3 Heat Settings, Adjustable Thermostat, Tip-Over and Overheat Protection, ETL Safety Certificate, 1500W, Black |
|
| 6 | Amazon Basics Portable Oil Radiator Heater, Indoor Use, 3 Heat Settings, Over-Heat Protection, ETL-certified Safety, 7 Oil-Filled Steel Fins, 1500W, Tip-Over Protection, 11"D x 14.8"W x 25.2"H, White |
|
| 7 | PELONIS Radiator Heater for Large Space, Electric Oil Filled Radiator, Dual Knobs, 1500W, Quiet Space Heater, 3 Modes, Tip-over Protection |
|
| 8 | PELONIS Radiator Heater for Large Space, Electric Oil Filled Radiator, Dual Knobs, 1500W, Quiet Space Heater, 3 Modes, Tip-over Protection |
|
| 9 | DREO Oil Filled Radiator, Electric Radiant Heaters for indoor use Large Room with Remote Control, Child Lock, 4 Modes, Overheat & Tip-Over Protection, 24h Timer, Digital Thermostat, Quiet, 1500W |
|
| 10 | Pelonis Oil Filled Radiator Heater for Large Space, 2025 Upgraded, Space Heaters with 1500W Quiet Warmth Radiant Heater, 3 Heating Modes, Overheat & Tip-Over Protection, Adjustable Thermostat, Black |
|
Before touching any part of the radiator, safety is paramount.
- Unplug the radiator: Completely disconnect the appliance from the power outlet. Never attempt any repairs on a plugged-in device.
- Allow to cool completely: Oil-filled radiators retain heat for a long time. Wait several hours until the unit is cool to the touch.
- Clear surrounding area: Remove any flammable materials, furniture, or obstacles around the radiator to give yourself ample working space.
- Place protective sheeting/rags: Lay down old newspapers, cardboard, or a drip tray beneath and around the radiator to catch any oil that might spill during the repair. Wear your protective gloves and safety glasses.
Locating the Exact Leak Source
Once the area is prepped, accurately identifying the leak’s origin is key.
- Clean the radiator: Wipe down the entire exterior of the radiator with a rag to remove any existing oil residue.
- Observe for new drips: With the radiator clean, carefully inspect all potential leak points. Use your flashlight to get a clear view into crevices and under components.
- Common suspects: Pay close attention to the filler cap or plug, the area where the electrical heating element enters the body (often under the control panel), and any visible bolts or seams. Sometimes, simply tilting the radiator slightly can help reveal the leak’s exact location as the oil shifts.
Repairing Leaks from Bolts, Nuts, or Plugs
This is one of the most common and often DIY-friendly types of leaks.
- For loose connections: If you find a nut or bolt that appears to be the source of the leak and it feels loose, try gently tightening it with your adjustable wrench or spanner. Do not overtighten, as this can strip threads or crack the casing. Check if the leak stops after tightening.
- For persistent leaks (requiring disassembly):
- Position the radiator: If the leak is from a bolt or plug that is difficult to access, you might need to carefully turn the radiator on its side or upside down so the leaking point is facing upwards. This can help minimize oil spillage when the bolt is removed.
- Remove the bolt/nut: Using the appropriate wrench, carefully unscrew the leaking bolt or nut. Have rags ready to catch any oil that drains out. Note that for smaller leaks, minimal oil may escape.
- Clean threads and surfaces: Thoroughly clean both the threads of the bolt/nut and the opening on the radiator to remove any old sealant or residue.
- Apply PTFE tape: Take your heavy-duty PTFE tape and wrap it clockwise around the threads of the bolt or plug. Apply 3-5 layers, ensuring it covers all the threads adequately. Wrapping clockwise ensures the tape tightens as the bolt is screwed in.
- Re-insert and tighten: Carefully re-insert the bolt or plug into its opening. Hand-tighten it first, then use your wrench to tighten it securely. Again, avoid excessive force.
Addressing Leaks from Heating Element Flanges or Gaskets
Leaks from around the heating element require more caution due to the electrical components. If you are uncomfortable working with electrical parts, please consult a professional.
- Access the element: You will typically need to remove a metal or plastic cover that houses the controls and the heating element connection. This usually involves unscrewing a few screws.
- Photograph wiring: Crucially, before disconnecting any wires, take clear photos of the wiring configuration. This will be invaluable when reassembling.
- Carefully disconnect wires: Note the position of each wire and gently disconnect them from the element terminals.
- Loosen/remove the flange: The heating element is usually secured by a large nut or several smaller bolts around a flange. Carefully loosen and remove these. You may need a large spanner or wrench.
- Inspect and replace gasket: Once the flange is removed, gently pull the element out a little to inspect the gasket (a rubber or fiber ring) that seals it. If the gasket is cracked, brittle, or torn, it needs to be replaced.
- Apply gasket sealant (optional but recommended): If you are reusing the old gasket (only if it’s in good condition) or installing a new one, apply a thin, even layer of oil-resistant, high-temperature gasket sealant to both sides of the gasket before reassembly.
- Reassemble and tighten: Carefully re-insert the element, ensuring the gasket is properly seated. Re-attach the flange and tighten the nuts/bolts evenly and securely.
- Reconnect wiring: Refer to your photographs and carefully re-connect all the electrical wires to their original terminals.
- Replace cover: Securely re-attach the protective cover.
What About Leaks from Welded Seams or Cracks?
Unfortunately, leaks stemming from actual cracks in the radiator’s metal body or compromised welded seams are generally not suitable for DIY repair. These types of leaks require specialized welding, which is beyond the scope of home repair and often not cost-effective compared to replacing the unit. Attempting to patch a structural crack with external sealants is usually a temporary fix that will likely fail and could pose a safety risk. In such cases, replacing the oil-filled radiator is often the safest and most practical solution.
Testing Your Repair and Refilling Oil (If Applicable)
Once your repair is complete, it’s essential to test it thoroughly before returning the radiator to regular use.
- Allow sealants to cure: If you used any gasket sealant, allow the recommended curing time specified by the manufacturer (this can range from a few hours to 24 hours).
- Carefully plug in and monitor: Once the curing time has passed, plug the radiator back into a power outlet. Set it to a low-to-medium heat setting.
- Observe for leaks: Over the next few hours, and even days, meticulously check the repaired area for any signs of new oil leakage. Look for drips, dampness, or oil streaks. It’s wise to place a piece of paper or cardboard underneath the repaired area to easily spot any new drips.
- Refilling oil (caution advised): Oil-filled radiators are factory-sealed and contain a specific type and amount of diathermic oil. They are generally not designed for user refilling. While some minor leaks might result in negligible oil loss, if a significant amount of oil has escaped, it’s usually indicative of a major leak that might make the unit unrepairable. Attempting to refill with incorrect oil or an improper amount can lead to inefficient heating, damage to the element, or safety hazards. If you believe a substantial amount of oil needs to be replaced, it’s best to consult the manufacturer or a professional, as they would use specialized equipment and oil. For most DIY leak repairs, refilling the oil is not necessary or recommended.
Maintenance Tips to Prevent Future Leaks
Proactive maintenance can significantly extend the life of your oil-filled radiator and prevent future leaks.
- Regular Cleaning: Keep your radiator free of dust and debris, especially around the control panel and element entry points. Dust can contribute to overheating and component degradation.
- Avoid Rough Handling: Do not drop the radiator or subject it to harsh impacts, which can damage the sealed casing or internal components.
- Store Properly: When not in use, store the radiator upright in a dry, safe place where it won’t be knocked over or damaged.
- Check for Signs of Wear: Periodically inspect your radiator for any visible signs of corrosion, loose screws, or cracking, particularly around plugs and seams. Addressing these issues early can prevent a full-blown leak.
By following these simple maintenance tips, you can help ensure your oil-filled radiator remains a reliable and leak-free source of warmth for years to come.
Conclusion
A leaking oil-filled radiator can be a nuisance, but with a careful assessment and the right approach, many common leaks can be successfully repaired through DIY methods. By understanding the common sources of leaks, gathering the correct tools, and meticulously following safety procedures, you can restore your radiator to full working order. Remember to prioritize safety above all else, always disconnect the power, and know when a leak is beyond a DIY fix, requiring professional attention or even replacement. Regular maintenance is your best defense against future issues, ensuring your home stays comfortably warm throughout the colder months. Have you had success repairing a radiator leak yourself, or faced a particularly challenging one?
Frequently Asked Questions
Is it safe to use an oil-filled radiator that is leaking?
No, it is generally not safe to use a leaking oil-filled radiator. The escaping oil can create a slip hazard, damage flooring, and, more critically, may pose an electrical shock or fire risk if it contacts electrical components. Always unplug a leaking radiator immediately and do not use it until the leak is fixed.
Can I add engine oil to my oil-filled radiator?
Absolutely not. Oil-filled radiators use a specific type of diathermic oil, which is non-conductive, non-corrosive, and designed to handle specific temperatures. Engine oil or any other type of oil is not suitable and can damage the heater, pose a severe fire hazard, or cause electrical shorts. Radiators are also factory-sealed and generally not meant for user refilling.
How much does it cost to fix an oil-filled radiator leak?
The cost can vary significantly depending on the nature of the leak and whether you attempt a DIY repair or hire a professional. DIY repairs typically only involve the cost of materials like PTFE tape (a few dollars). Professional repairs can range from $50 to $200 or more, depending on labor rates and parts needed. Often, if the repair is complex, replacing the unit might be more cost-effective.
How long do oil-filled radiators last?
With proper care and maintenance, a good quality oil-filled radiator can last anywhere from 5 to 10 years, or even longer. Their durability comes from having no moving parts (apart from controls) and a sealed heating system. Regular cleaning and careful handling contribute significantly to their lifespan.
What are the common reasons for oil-filled radiator leaks?
Common reasons for leaks include loose or degraded filler caps/plugs, deteriorating gaskets around the heating element, stress cracks in welded seams from years of heating and cooling, or physical damage to the unit. Over time, the materials can simply wear out or become compromised.
