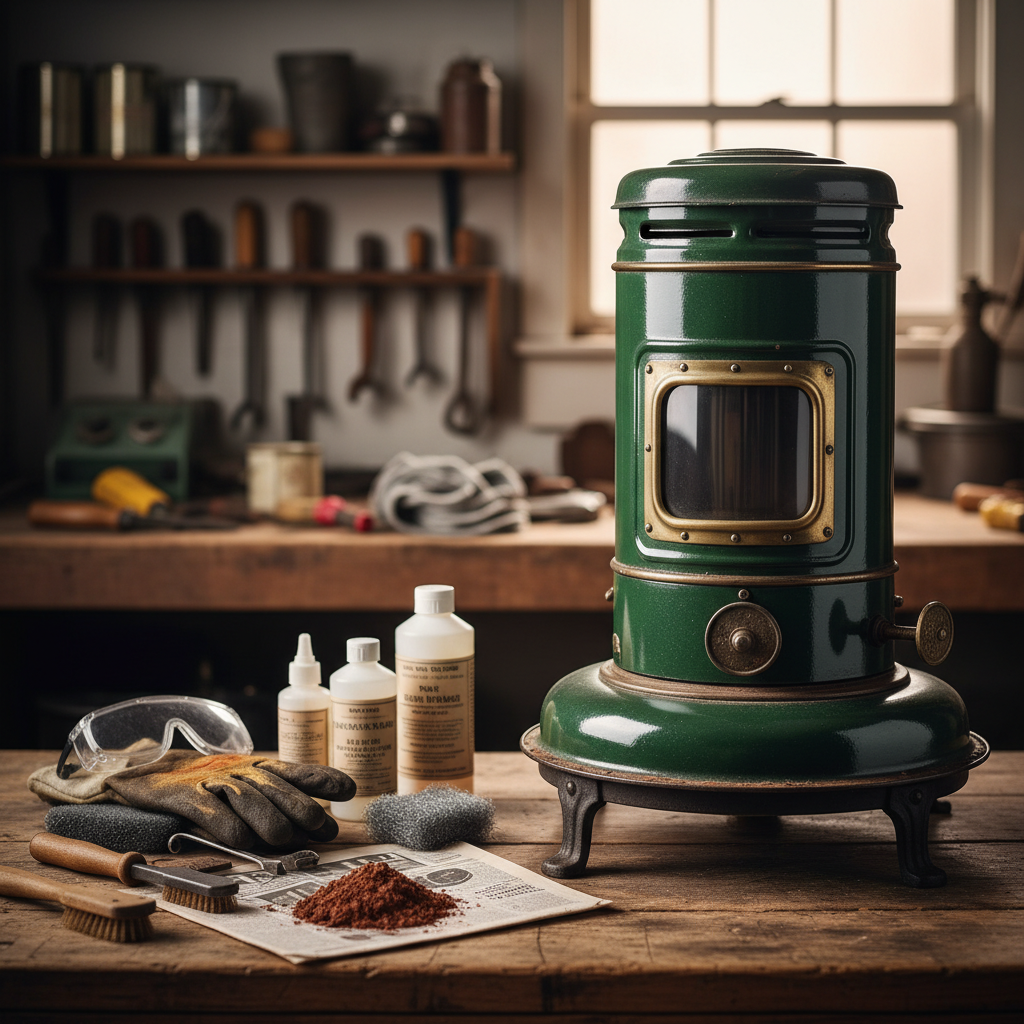
Bringing a vintage oil heater back to its former glory can be a deeply satisfying project, transforming a rusty relic into a functional and charming piece of history. Over time, these classic heating units, cherished for their robust construction and efficient warmth, often succumb to the inevitable effects of rust. This guide will walk you through the essential steps, from understanding why rust forms to applying the best methods for safe and effective removal, ensuring your cherished appliance shines once more.
What Causes Rust on Vintage Oil Heaters?
Rust, scientifically known as iron oxide, is the result of iron or its alloys (like steel) reacting with oxygen and moisture. Vintage oil heaters, often constructed from cast iron or steel, are particularly susceptible to this corrosive process. Environmental factors such as high humidity, condensation, and direct exposure to water accelerate rust formation, slowly degrading the metal and compromising both aesthetics and function. Years of storage in damp basements, garages, or unheated spaces without proper protection are common culprits for the rust found on these enduring machines.
Essential Safety Precautions Before You Begin
Before embarking on any restoration work, prioritize safety to protect yourself and your vintage heater. Always ensure the heater is completely disconnected from any power source and fully drained of fuel if it’s a kerosene model. Work in a well-ventilated area to disperse fumes from cleaning agents or paint. Personal protective equipment, including sturdy gloves, eye protection, and a respirator, is crucial when dealing with rust particles, chemicals, or paint. Exercise extreme caution when using any power tools or strong chemical solutions, as vintage materials can be brittle or react unexpectedly.
Step-by-Step Disassembly for Effective Rust Removal
Thorough rust removal often necessitates careful disassembly of your vintage oil heater. This crucial first step allows you to access all rusted components, both visible and hidden, for comprehensive treatment. Begin by photographing each stage of disassembly, which will serve as an invaluable reference during reassembly. Use appropriate tools, and for any seized bolts or connections, apply a penetrating oil like WD40 or PB Blaster and allow it to sit for some time before attempting to loosen them. Documenting the location of each screw, nut, and panel will prevent frustration later on. Once dismantled, clean away any old kerosene residue, dirt, or debris from all parts.
Effective Rust Removal Methods for Different Rust Levels
The approach to rust removal should be tailored to the severity of the corrosion on your heater’s components. Different methods work best for varying levels of rust, from superficial blemishes to deep-seated deterioration.
Light Surface Rust: Gentle Approaches
|
Our Picks for the Best Oil filled radiator in 2026
As an Amazon Associate I earn from qualifying purchases.
|
||
| Num | Product | Action |
|---|---|---|
| 1 | PELONIS Radiator Heater for indoor use Large Room with Remote, Thermostat & LED Display, Quiet Oil Filled Heater with 5 Temperature Settings, Overheat & Tip-Over Protection, Silver |

|
| 2 | Amazon Basics Portable Oil Space Heater with Remote Control, 7 Oil-Filled Fins, Adjustable Thermostat, 3 Heat Settings, Tip-Over and Overheat Protection, ETL Safety Certificate, 1500W, Black |
|
| 3 | Amazon Basics Portable Oil Space Heater with 7 Oil-Filled Fins, 3 Heat Settings, Adjustable Thermostat, Tip-Over and Overheat Protection, ETL Safety Certificate, 1500W, Black |
|
| 4 | DREO Oil Filled Radiator, Electric Radiant Heaters for indoor use Large Room with Remote Control, Child Lock, 4 Modes, Overheat & Tip-Over Protection, 24h Timer, Digital Thermostat, Quiet, 1500W |
|
| 5 | PELONIS Oil Filled Radiator, Electric Space Heater for Indoor Use Large Room with Thermostat & Remote, 3 Modes & 3 Heat Settings, ECO Mode, 24H Timer, Quiet, Overheat & Tip-Over Protection, 1500W |
|
| 6 | Amazon Basics Portable Oil Radiator Heater, Indoor Use, 3 Heat Settings, Over-Heat Protection, ETL-certified Safety, 7 Oil-Filled Steel Fins, 1500W, Tip-Over Protection, 11"D x 14.8"W x 25.2"H, White |
|
| 7 | Pelonis Oil Filled Radiator Heater for Large Space, 2025 Upgraded, Space Heaters with 1500W Quiet Warmth Radiant Heater, 3 Heating Modes, Overheat & Tip-Over Protection, Adjustable Thermostat, White |
|
| 8 | Pelonis Oil Filled Radiator Heater for Large Space, 2025 Upgraded, Space Heaters with 1500W Quiet Warmth Radiant Heater, 3 Heating Modes, Overheat & Tip-Over Protection, Adjustable Thermostat, Black |
|
| 9 | PELONIS Radiator Heater for Large Space, Electric Oil Filled Radiator, Dual Knobs, 1500W, Quiet Space Heater, 3 Modes, Tip-over Protection |
|
| 10 | PELONIS Radiator Heater for Large Space, Electric Oil Filled Radiator, Dual Knobs, 1500W, Quiet Space Heater, 3 Modes, Tip-over Protection |
|
For light surface rust, gentle mechanical and acidic methods can be highly effective without damaging the underlying metal or paint. You can start by gently scrubbing the affected areas with fine-grade steel wool, a soft wire brush, or even crumpled aluminum foil, applying moderate pressure to lift the rust. For a natural acidic solution, a paste made from white vinegar or lemon juice mixed with a dash of table salt can be applied directly to the rust. Allow it to sit for a few hours before scrubbing and wiping clean. Another effective gentle method is a baking soda paste, created by mixing equal parts baking soda and water. Apply this thick paste to the rusted spots with a wet rag, letting it adhere for several hours before scrubbing and rinsing off.
Moderate to Heavy Rust: Soaking and Chemical Solutions
When dealing with more stubborn or widespread rust, stronger methods involving soaking or specialized chemical solutions are often required. A popular and cost-effective approach is a vinegar bath: submerge heavily rusted parts in a 50/50 mixture of apple cider vinegar and water. This acidic solution will gradually dissolve the rust, but it’s essential to monitor the parts frequently (every few hours or daily, depending on rust severity) to prevent damage to the metal. For those seeking faster or more potent options, commercial rust removers such as Workshop Hero Metal Rescue or Rust Doctor offer efficient results. These products are often formulated to be less aggressive on the base metal while effectively neutralizing rust. An interesting alternative, especially for larger items, is a molasses bath, which involves soaking parts in a diluted molasses-water solution for several days. This non-toxic method slowly converts rust, often preserving underlying paint. For advanced restorers, electrolysis, using washing soda, water, and a battery charger, provides a highly effective and non-toxic way to remove heavy rust, leaving behind clean metal.
Tackling Stubborn Paint and Residue
Beyond rust, vintage heaters often present challenges with layers of old, flaking paint or stubborn kerosene residue. For baked-on grime and old kerosene, oven cleaner can be surprisingly effective. Apply it to the affected areas, allowing it to penetrate before scrubbing and rinsing thoroughly. When old paint needs to be removed, especially if you plan to repaint, a wire brush or wheel attached to a drill or grinder can strip away layers quickly. However, use caution with wire wheels, as they can scratch the metal surface, which may be undesirable if you are trying to preserve the original finish or do not plan to repaint. Always test any paint stripping method on an inconspicuous area first to ensure it doesn’t damage the underlying metal.
Post-Cleaning: Drying, Protection, and Reassembly
Once all rust and old finishes have been removed, the post-cleaning phase is critical for preserving your restoration work and preventing future corrosion.
Thorough Drying to Prevent Recurrence
After cleaning, it is absolutely paramount to thoroughly dry every single component. Even a small amount of residual moisture can immediately invite new rust to form, undoing all your hard work. Use clean cloths to wipe down parts, and for intricate sections, consider using compressed air. Allowing parts to air dry completely for at least 24-48 hours in a low-humidity environment is advisable before moving on to protection.
Applying Protective Coatings
To shield your vintage heater from future rust, apply a protective coating. A quality paste wax, such as Minwax or an automotive paste wax, can be applied in small, circular motions. Once dry, buff it off with a clean, soft cloth to create a barrier against moisture. Alternatively, Armor-All, applied to a cloth and then wiped onto the metal, can offer a protective sheen. If you plan to repaint, first apply a rust-inhibiting primer to all bare metal surfaces. This step provides a critical foundation that seals the metal and actively resists corrosion before the final paint layer is applied.
Careful Reassembly
With all parts cleaned, protected, and dried, carefully reassemble your vintage oil heater. Refer back to the photographs you took during disassembly to ensure every component is placed correctly. Pay close attention to gaskets and seals, replacing them if they appear brittle or damaged, especially in fuel-burning models, to prevent leaks. After reassembly, if it’s a fuel heater, perform a thorough leak test before adding fuel and operating the unit. If it’s an electric heater, visually inspect all wiring and connections.
When to Seek Professional Help
While many rust removal and restoration tasks can be handled by an enthusiast, there are instances where professional intervention is the wisest course of action. If your vintage heater has extensive damage to its enamel finish that requires re-enameling, which can be a costly and specialized process, a professional restorer is recommended. Similarly, if there are concerns about the structural integrity of the heater, such as cracks in vital components, or if you are uncomfortable dealing with complex electrical systems or fuel components, it’s best to consult an expert. A professional can ensure the heater is not only aesthetically restored but also safely operational.
Conclusion
Restoring a vintage oil heater by carefully removing rust is a rewarding endeavor that breathes new life into a piece of history. By understanding the causes of rust, adhering to strict safety protocols, and employing the right methods for cleaning and protection, you can transform a neglected artifact into a functional and beautiful focal point for your home. Remember that patience and attention to detail are key to achieving a successful restoration, ensuring your vintage heater continues to provide warmth and charm for years to come. What unique stories do you hope your restored vintage oil heater will tell in your home?
Frequently Asked Questions
Can I use household chemicals like bleach to remove rust from my oil heater?
No, bleach is not recommended for rust removal. It can be highly corrosive to metals, potentially causing further damage, discoloration, and creating hazardous fumes when mixed with other cleaning agents. Stick to methods like vinegar or commercial rust removers designed for metal.
How often should I inspect my vintage oil heater for rust after restoration?
It is advisable to inspect your vintage oil heater at least once a year, preferably before the heating season begins. Pay close attention to areas prone to moisture or those that previously had rust. Early detection allows for minor touch-ups before rust becomes widespread.
Is it safe to paint over light rust on a vintage oil heater?
It is generally not recommended to paint directly over rust. Even light rust should be removed and the metal properly primed with a rust-inhibiting primer before painting. Painting over rust can trap moisture and allow corrosion to continue underneath the new paint layer.
What is the best way to store my oil heater to prevent rust?
Store your oil heater in a dry, low-humidity environment, ideally off the floor. Covering it with a breathable cloth can protect it from dust while allowing air circulation. Applying a thin coat of protective wax before storage can also provide an additional barrier against moisture.
